Over the past few years, die cut folders have become a very popular office supply item that most companies and schools have in their offices. They make it easy to store documents and keep them organized, but many people don’t know how to customize the folders with their own design, which can be useful in many ways such as creating recognition awards or giving your office more personality.
What are die cut folder?
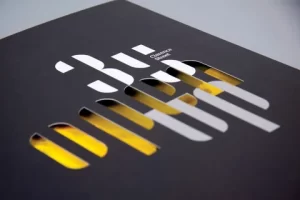
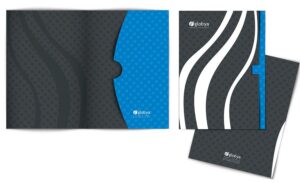
Customize Die cut folders are a quick and easy way to keep your papers organized. They come in many shapes and sizes, but the most common is the rectangular shape. The clear plastic cover allows you to see what is inside without having to open it, while the die cut makes it easy to grab whichever paper you need. This means that die cut folders work great for people who are always on-the-go or have a lot of different projects going at once.
How to choose the right shape and size
Choosing the right shape and size can be an overwhelming process. There are a lot of shapes to choose from, and they each serve different purposes. For example, you may want a rectangular shape if you’re creating business card or an ovoid shape if you’re creating invitations. Likewise, there are multiple sizes available for each shape. If your business card has more information than will fit on a 4×8 card, then you’ll need a 5×7 card or even 6×8 if necessary. The best way to determine which type of die cut folder is right for your project is to imagine what it will look like when it’s finish and see which shape best fits the finish product.
What kind of paper to use
You will need to use card stock paper for your die cut folders. It can be purchase at any office supply store and is usual found in the aisle with the hole punch machine. Pick a colour of cardstock that complements the design on your label. If you are using a plain white label, then any colour will work well. However, if your label is print with a design or has an interesting texture, try to match it with a corresponding cardstock colour or texture. For example, I have a sticker that has glossy yellow printing on a black background. I could go with glossy yellow cardstock as my cover or textured black cardstock as my cover. The decision depends on what the rest of my project looks like.
Assembling your die cut folder

- Create your file with your desired die cut folders design.
- Print out your desired design onto some card stock paper, making sure to select a mirror image or reverse. After you have printed out your die cut shapes, cut them out and set them aside for now.
- Now you will want to print the cards you would like to put into the die cut folders on regular paper with regular ink settings in order to see what they will look like when they are placed inside a die cut folder. If you need to resize the card before printing it, make sure to do this after applying the mirror or reverse function so that when it prints out correctly, you’ll know if there was a need to re-adjust anything. Place these cards face down next to your stack of die cut pieces from step two.
- Place both stacks together so that the backside of each piece matches up with each other and apply light pressure until everything seems snugly secured together.
- Using scissors, trim off any excess paper from the front side of the dies. You may want to go over the edges again for good measure.
- Now place all the pieces back together so that the front sides line up once more, including placing your newly trimmed die cuts against their respective backgrounds and press down again until everything is secure.
- Finally flip your die cut folder design over and remove all loose scraps of cardstock from between all layers using a tool like an X-Acto knife or credit card’s edge in order to ensure a smooth finish with no visible gaps between layers.
Decorate your die cut folder
Next up, it is time to decide how you want to decorate your die cut folders! There are many ways you can customize a die cut folder: by adding stickers or drawings on top of the die cut shape, by adding labels below the background shape, by painting or drawing something outside of the designated area (either above or below), etc.