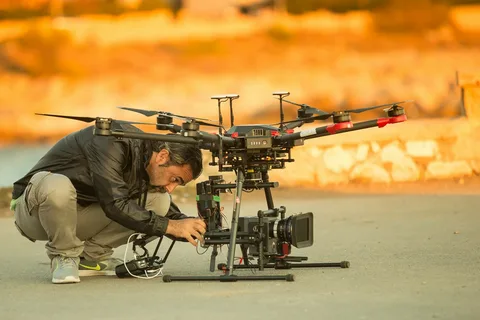
The video production industry has been transformed by radio-controlled flying drone videography. These small camera-equipped flying machines are being used for a variety of creative purposes, ranging from real estate videos to aerial shots of your wedding. According to Allied Marketing research, drone imaging and videography will grow to a $2.8 billion industry by 2022. Well, the growth isn’t solely due to drones, but also to subsequent advancements in imaging technology. Anyone can now fly a drone around and capture high-resolution aerial images using a mobile app. It’s a fascinating technology that allows you to accomplish amazing things!
Drones provide a new perspective on locations. As a result, they can be used anywhere to establish a setting or highlight a location. Drones can be a useful tool for marketing, promotion, and content generation, whether it’s an outdoor college event, a visit to a heritage site, or a real estate video. Drones are now widely used in film production, commercial shoots, surveillance, travel blogging, and even fishing!
10 Tips to Better Your Drone Videos Like a Pro
If you have a drone and want to improve your videography skills, these ten tips can help.
1. Know Your Device
Drone videography has advanced significantly. These are the same machines that were (and still are) used for border surveillance and bombing! A drone is any aircraft that is unmanned, remote-controlled, and capable of taking photographs! Today’s technology sees a massive opportunity in the photography market. Because of the increased demand, several manufacturers have developed competing products. While DJI is the most well-known brand in the market, enthusiasts can also create assembled drones on their own! To make the most of your device, you must first understand how it works. DJI quadcopters, for example, have built-in cameras or 360-degree GoPro connectors.
2. Shoot RAW
If you want to make high-end films and rely on post-production for creative cinematic effects, RAW is always the way to go. Unless you’ve just started posting Instagram videos, no movie is made in a single fly. Shooting RAW allows you to improve the quality of your photographs/videos and showcase ‘drama’ to your audience! Unless you’re looking for ready-to-post shots, never think otherwise. You should also know professional techniques to turn your raw footage into an eye-catching video. If you don’t know the art of editing, consider hiring some video editing service to get your job done.
3. HDR and Bracketing
HDR is a fantastic feature, and you’ll be pleased to know that most DJI products incorporate it into the in-built camera processing. If that is not the case, you can always use HDR in post-production. To create an HDR shot, you must first understand bracketing, which is the process of taking multiple photos of the same frame at different exposures and combining them into a single photo/video. HDR images and videos add a lot of drama to your images and videos. This is yet another reason to shoot in RAW format.
4. Understanding the P and M Modes
Most professionals will shoot in M or Manual mode, which allows you to adjust the shutter speed and ISO to your liking. However, if you’re using a DJI app, it’ll be difficult to tell if your photograph is over or underexposed. This is when the ‘P’ or Program mode is useful. Once you’ve determined the exposure, you can always return to manual mode and fine-tune the settings. Overall, the more time you spend with your drone, the more familiar you will become with its features and shooting modes.
5. Flying Low for Cinematic Experience
Slow shutter speeds and eye-level shots are always cinematic. Flying low and gradually increasing your altitude is also an excellent way to establish your location, whether you are attempting to highlight a landscape or an event. It piques your audience’s interest and never fails to captivate them. Take a look at this video to see what we mean!
6. Using NDR and CPL Filters
NDR (Neutral Density) and CPL (polarizing) filters assist you in adjusting to the available light and producing the best images. CPL filters, for example, would be absolutely necessary if you were attempting to determine the true colors of the sky or water. It removes extra light reflected from surfaces, resulting in more saturated images.
7. Go Slow
Slow is cinematic, and it gives the impression of being shot from higher platforms, such as helicopters. This will undoubtedly increase the production value of your work. Slowing down gives you more control and craft over the video you’re attempting to capture. Slow also equates to stability, and once you have a stable video, you can experiment with production changes.
8. Fly-Through Shots
When you’ve mastered your drone controls, try this. Fly-through shots immerse the audience in the environment but are risky for the camera. Don’t try them unless you’re confident in your piloting abilities.
9. Find Yourself a Community
To improve your flying skills, you must practice, and it is always a good idea to be a part of a community that regularly discusses, meets, and shares new ideas. These communities will keep you up to date on the latest products, flying trends, and money-making opportunities.
10. Post Processing
Post-production is responsible for a large portion of a good drone video. While most video post-production is done by a separate professional, you should be aware of what the project requires in order to create decent videos in the first place. Both stages have their own limitations, but they are fairly balanced by one another.


